TurtleBot3自动驾驶Noetic-3-1.车道线检测实车操作
车道检测包允许 Turtlebot3 在没有外部影响的情况下在两条车道之间行驶。
以下说明描述了如何使用车道检测功能以及通过 rqt 校准摄像头。
将 TurtleBot3 放置在黄色和白色车道之间。
注意:确保黄色车道位于机器人左侧,白色车道位于机器人右侧。
在Remote PC上启动 roscore
roscore
触发相机SBC。
roslaunch turtlebot3_autorace_camera raspberry_pi_camera_publish.launch
在Remote PC
roslaunch turtlebot3_autorace_camera intrinsic_camera_calibration.launch mode:=action
在Remote PC
roslaunch turtlebot3_autorace_camera extrinsic_camera_calibration.launch mode:=action
Remote PC运行车道检测启动文件
roslaunch turtlebot3_autorace_detect detect_lane.launch mode:=calibration
在Remote PC 上执行 rqt
rqt
单击插件>可视化>图像视图;将出现多个窗口。
在每个图像视图中选择三个主题:
/detect/image_yellow_lane_marker/compressed
/detect/image_lane/compressed
/detect/image_white_lane_marker/compressed
左(黄线)和右(白线)屏幕显示过滤后的图像。中心屏幕是 TurtleBot3 的相机视图。

/detect/image_yellow_lane_marker/compressed主题
/detect/image_white_lane_marker/compressed主题
/detect/image_lane/compressed主题的图像视图
在Remote PC上执行 rqt_reconfigure
rosrun rqt_reconfigure rqt_reconfigure
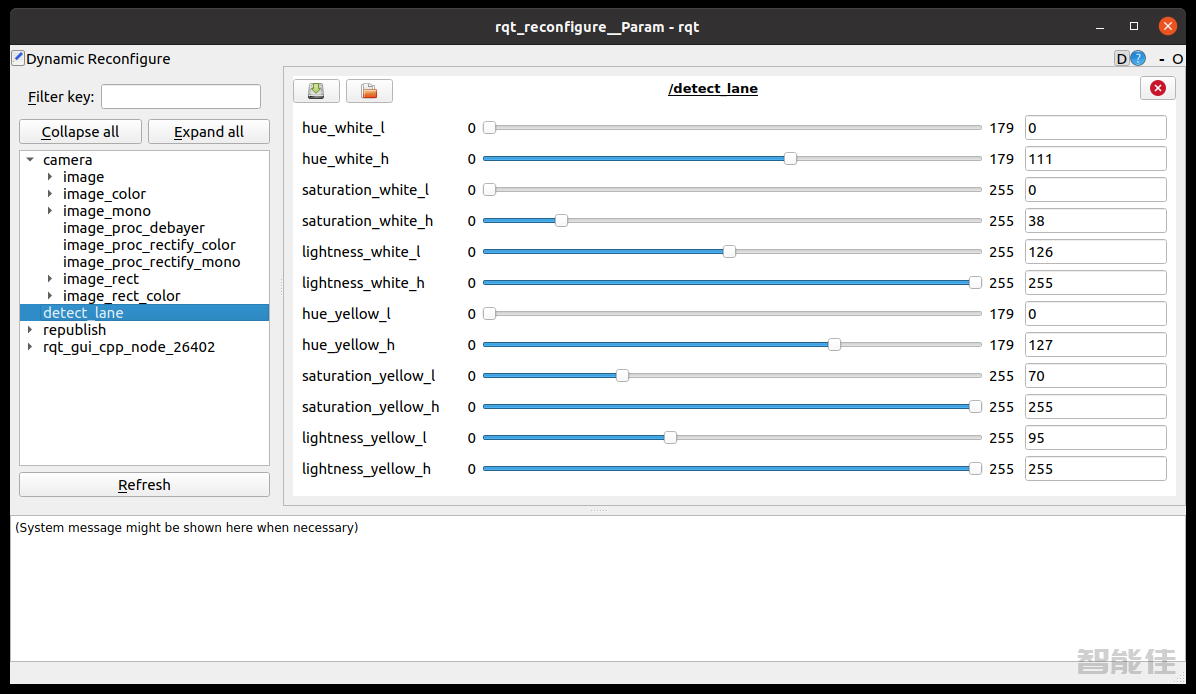
点击Detect Lane然后调整参数进行线条颜色过滤。


TIP : 线色过滤的校准过程有时会因为物理环境而变得困难,例如房间里的光线亮度等。为了让一切快速,请将位于turtlebot3 autorace _detect/param/lane中的lane.yaml文件的值/上重新配置参数,然后开始校准。首先校准色调低 - 高值。(1) 色相值表示颜色,以及每种颜色,如,yellowwhite,有自己的区域色调值(参考hsv图)。然后校准饱和度低 - 高值。(2) 每种颜色也有自己的饱和度。最后,校准亮度低-高值。(3) 但是在源代码中,有自动调整功能,所以校准亮度低值是没有意义的。只需将亮度高值设置为 255。清晰过滤的线条图像将为您提供清晰的车道结果。
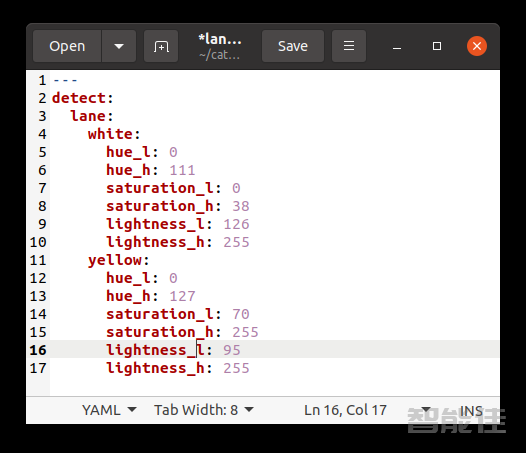
打开位于turtlebot3 _autorace _detect/param/lane/中的lane.yaml文件。您需要将修改后的值写入文件。这将使相机在下次启动时设置您在此处设置的参数。

关闭rqt_rconfigure和turtlebot3_autorace_detect_lane。
打开终端并使用命令 on Remote PC。
roslaunch turtlebot3_autorace_detect detect_lane.launch mode:=action
检查结果是否正确。
Remote PC打开终端并使用命令。
roslaunch turtlebot3_autorace_driving turtlebot3_autorace_control_lane.launch
打开终端并使用命令 on Remote PC。
roslaunch turtlebot3_bringup turtlebot3_robot.launch
使用命令后,TurtleBot3 将开始运行。
下一篇 >>